Your first workflow
By the end of this tutorial you’ll have a saved, runnable workflow in your workspace. It will have one trigger (the event that starts it), one agent action (the work it does), and one output (where the result goes). You’ll execute it once on demand to confirm it works.
This is part of the Getting started series. It takes about 8 minutes.
Before you start
- You’ve completed Tutorial 4 — Your first agent or at least one published agent already exists in your workspace.
- You’re signed in at https://store.no-downtime.com .
A workflow is a small recipe that connects pieces of TeamMate together. Where a chat is interactive (you type, the agent answers), a workflow runs on its own — either when something happens (a webhook, a schedule, a file uploaded) or when you click Execute.
Step 1 — Open the Automation page
- In the left sidebar, click Automation.
- You land on the Flows tab, which lists every workflow in your workspace. Existing flows show their status (Active, Draft, Not Active), what triggers them, and when they last ran.
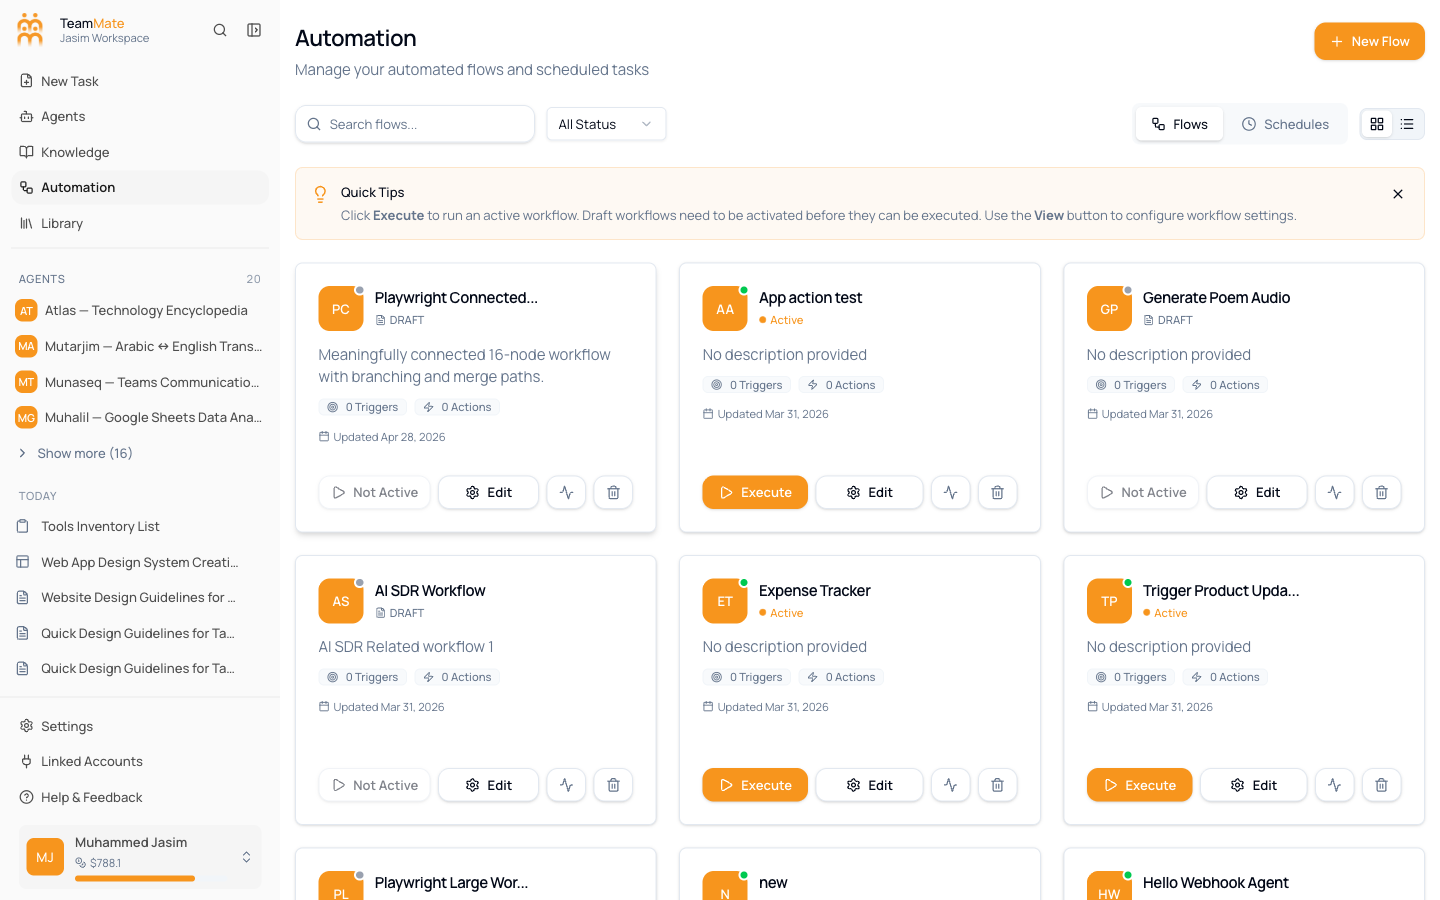
The tabs at the top let you switch between Flows (these workflows) and Schedules (jobs that run agents on a clock — covered in the next tutorial).
Step 2 — Create a new flow
- At the top-right of the page, click New Flow.
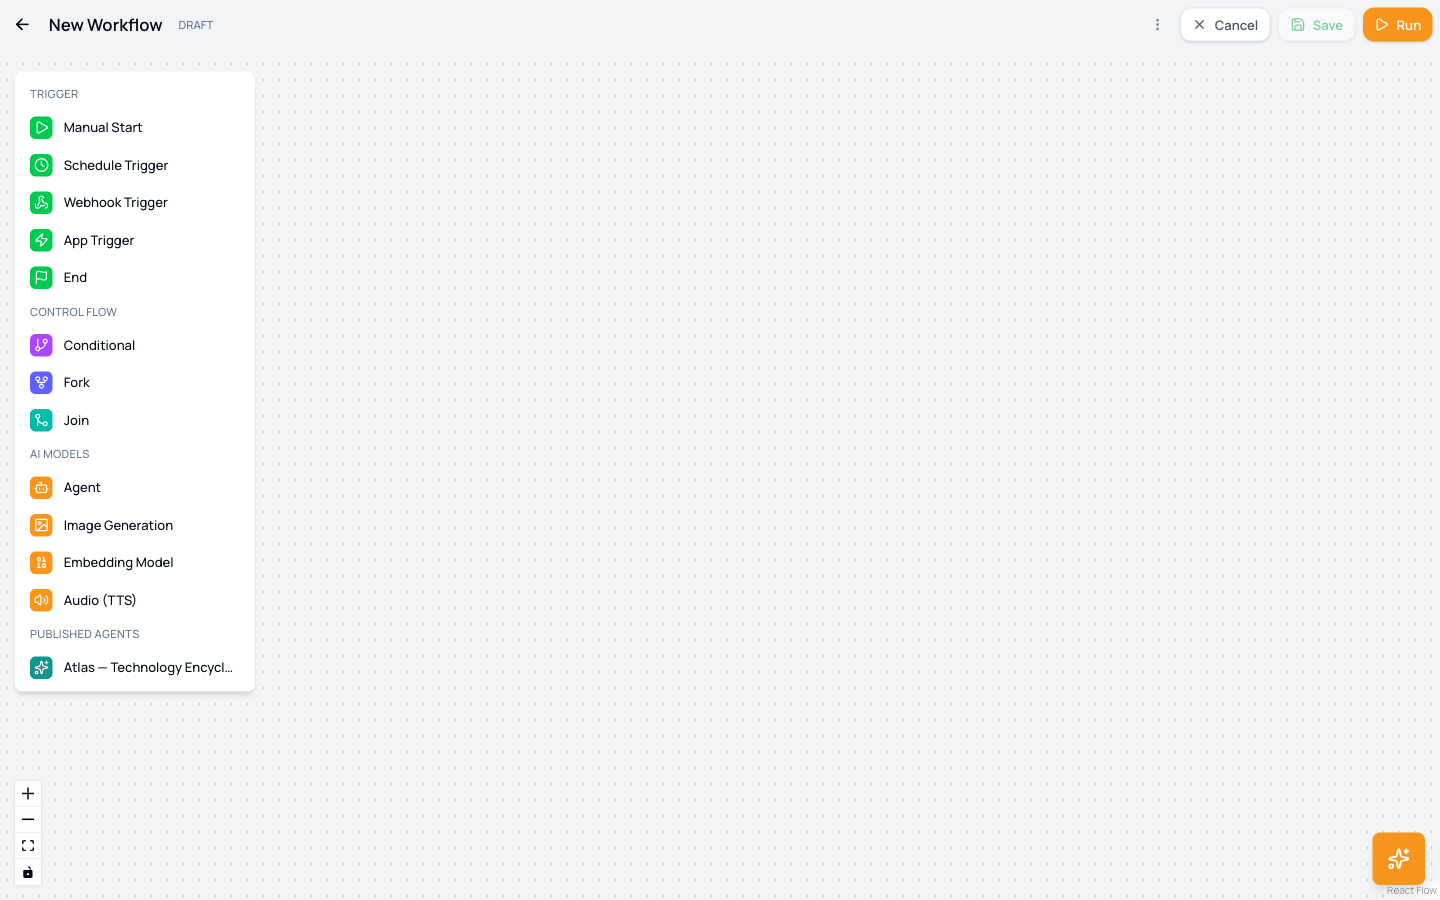
- The builder opens with a blank canvas. The empty centre is where your nodes will go; the panel on one side shows the catalogue of triggers and actions you can drop on.
Step 3 — Add a trigger
Every flow starts with one trigger. The trigger tells TeamMate when this flow should run.
- From the node catalogue, drag a trigger onto the canvas. Pick the simplest one for your first try: Manual (you press a button to start the flow).
- Click the placed trigger node to open its settings.
- If the trigger has configurable fields (most don’t, for Manual), fill them in. Manual triggers usually have nothing to configure.
Other triggers you’ll see in the catalogue, and when to use them:
| Trigger | What starts the flow |
|---|---|
| Manual | Clicking Execute on the Automation page. Useful for testing and one-off runs. |
| Schedule | A clock — once a day, once a week, or any cron expression. Covered in Tutorial 6. |
| Webhook | An HTTP POST from another system (Slack, Zapier, a custom integration). |
| Email received | An email lands at the workspace inbox. |
| File uploaded | A user uploads a file to the workspace. |
Step 4 — Add an agent action
The action is what the workflow does. The most common action is “Run an agent” — pass a prompt to one of your agents and capture its reply.
-
From the catalogue, drag an Agent action onto the canvas.
-
Click the placed agent node to open its settings.
-
Pick the agent you want to run. If you built one in Tutorial 4, pick that. Otherwise pick any published specialist.
-
In the Prompt field, write what you want the agent to do. Reference data coming in from the trigger using
{{trigger.<field>}}placeholders if you want to feed in dynamic content. For Manual triggers, you can hard-code a prompt.Example prompt for a “Run the Sales Coordinator” agent on a Manual trigger:
Draft a polite follow-up email to a prospect who asked for pricing two days ago. Sign off as “Sara”.
Step 5 — Wire trigger → agent
- Click the small dot on the right edge of the trigger node.
- Drag the line that appears across to the left edge of the agent node and release.
- A solid line now connects them — that’s the data path from trigger to action.
If the connection won’t form, you may be dragging the wrong handles. Each node has an input handle (left) and an output handle (right). Connections go output → input.
Step 6 — Save and name the flow
- At the top of the canvas, give your flow a name. Use something readable: “Daily Sales Follow-up” beats “test workflow 3”.
- Add a one-line description if there’s a field for it. This shows up on the flow list.
- Click Save.
The flow appears in your Automation → Flows list in Draft state.
Step 7 — Activate and test-run it
- Back on the Automation page, find your new flow in the grid.
- Click the Not Active toggle to activate it. It changes to Active.
- Click Execute.
The flow runs once. The execution appears under View executions with:
- Each node and how long it took.
- The exact data that flowed between nodes (handy for debugging).
- The final output.
If the agent action returns text, that’s your output. If the flow had an email or message node downstream, that’s where the result was delivered.
Step 8 — Read the execution
- In your flow’s row, click the View executions button (looks like a clock or list icon).
- Pick the latest run.
- Step through each node. You’ll see the inputs, the outputs, the time taken, and any errors.
This per-node view is your friend when something goes wrong. The status badge on each node tells you exactly which step failed, not just that “the flow failed”.
What you built
- A workflow named for the job it does, sitting in Automation → Flows.
- One trigger, one agent action, one connection, and one successful execution.
- An execution log you can revisit any time to see what happened.
How workflows differ from chat and from tasks
| When does it run | What does it do | |
|---|---|---|
| Chat | You open it and type | Conversational; interactive |
| Workflow | A trigger fires (or you press Execute) | A sequence of nodes runs once |
| Scheduled task | A clock (cron) ticks | Runs an agent on a schedule (next tutorial) |
If you find yourself running the same chat questions every day, that’s a workflow waiting to happen. If you find yourself running the same workflow at the same time every Monday, that’s a scheduled task — and it’s the next tutorial.
When the flow doesn’t run
- The Execute button is disabled — the flow is Not Active. Click the toggle to activate it.
- The execution failed at the agent node — open the execution detail and check the error message. Common causes: the agent is in Draft (publish it), the prompt referenced a
{{trigger.field}}that doesn’t exist, or the agent ran out of context. - Nothing happens when you click Execute — refresh the Automation page. The page sometimes needs a refresh after a fresh save.
- The output is empty — the agent ran but produced no text. Check its instructions are clear and that any required knowledge bases are attached.
Next
You can build a workflow. Now make one run on its own, on a schedule.