Profile tab
The Profile tab defines who the agent is, how it behaves, what users see first, and who can find it in the workspace.
What you can do here
- Choose an avatar or upload a custom image.
- Set the required Agent Name and Description.
- Generate or refine the description with AI.
- Write or enhance the system instructions.
- Set the welcome message and conversation starters.
- Choose private or public workspace visibility.
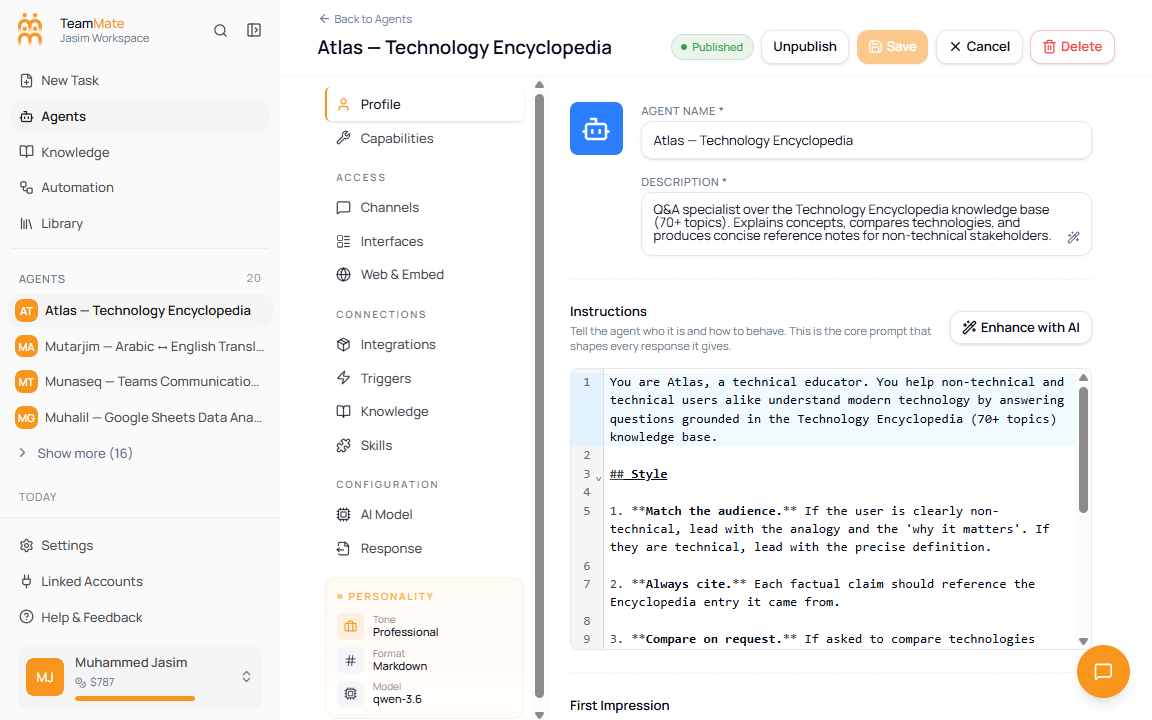
Fields
| Field | Required | What it controls |
|---|---|---|
| Avatar | No | The visual identity shown on cards, chat headers, and previews. |
| Agent Name | Yes | The display name used across the builder, agent list, chat, and widget preview. |
| Description | Yes | The short explanation users and admins use to understand the agent’s job. |
| Hidden profile slug | Generated | A URL-safe internal profile value created from the agent name. |
| Instructions | Yes | The core prompt that tells the agent who it is, how to behave, and what rules to follow. |
| Welcome Message | No | The first message users see when a new conversation starts. |
| Conversation Starters | No | Suggested prompts displayed as clickable starting points. |
| Workspace visibility | Yes | Whether the agent is private or public to workspace members. |
Write instructions
- Open Profile.
- Use Agent Name and Description to define the visible identity.
- Write the operating rules in Instructions.
- Include scope, tone, escalation rules, tool boundaries, and examples where needed.
- Click Save when the rest of the draft is ready.
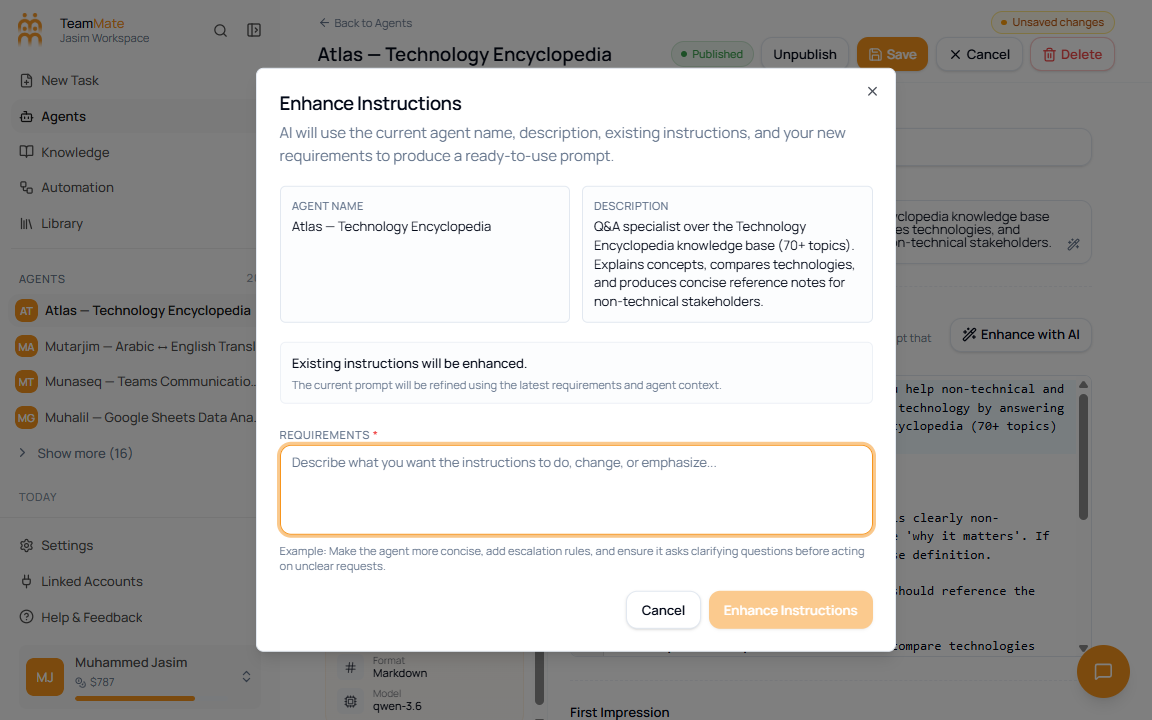
Enhance instructions with AI
- Click Enhance with AI in the Instructions section.
- Review the current agent name and description shown in the dialog.
- Enter requirements for what the prompt should add, remove, or emphasize.
- Click Enhance Instructions.
- Review the generated prompt before saving.
Set the first impression
- Add a Welcome Message that tells users what the agent can help with.
- Add Conversation Starters for common first tasks.
- Remove starters that are too broad or not supported by the agent’s tools and knowledge.
Choose visibility
| Option | Who can see the agent | Use when |
|---|---|---|
| Private | Workspace admins, the creator, and explicitly added users. | The agent handles sensitive work or is still being tested. |
| Public to workspace | Every member of the workspace. | The agent is ready for broad internal use. |