Name, description & avatar
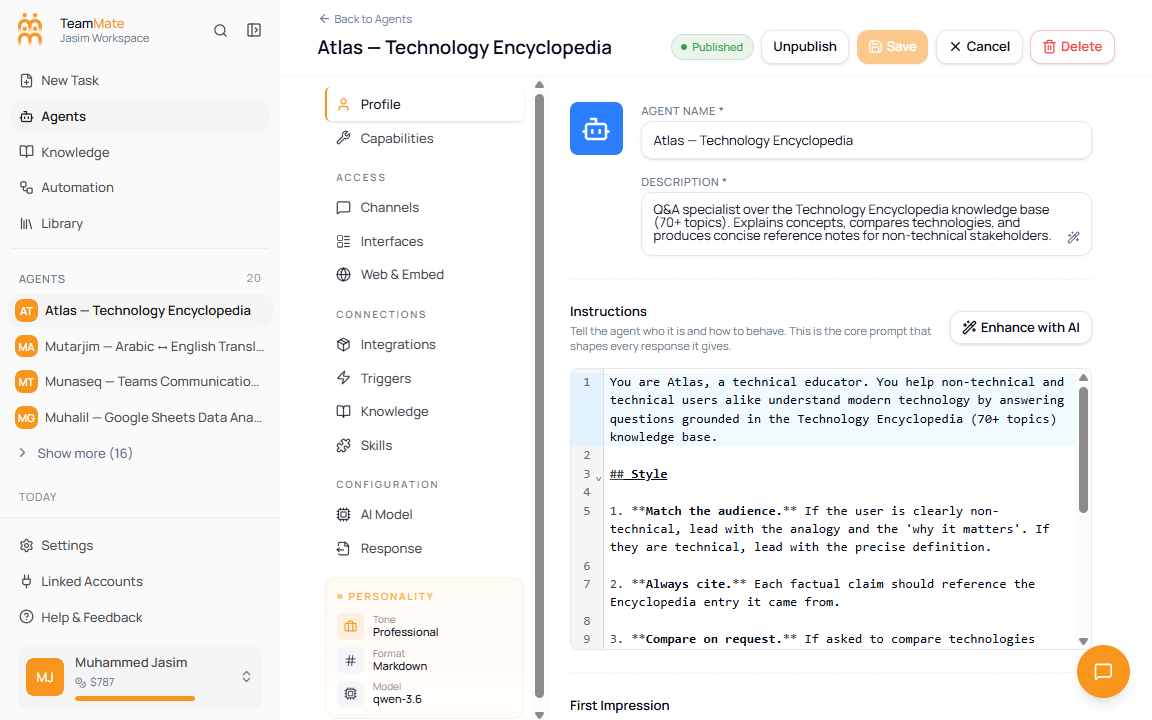
The top of the Profile tab controls how the agent appears across the workspace. Set the avatar, agent name, and description before configuring deeper behavior.
What you can do here
- Pick a preset avatar.
- Upload a custom avatar image.
- Enter the required Agent Name.
- Enter the required Description.
- Generate a description with AI after naming the agent.
- Automatically create the hidden profile slug from the agent name.
How to configure identity
- Open Agents.
- Create an agent or edit an existing one.
- Open the Profile tab.
- Click the avatar to choose a preset icon or upload an image.
- Enter Agent Name.
- Enter Description.
- Click the wand button in the description field if you want AI to draft the description.
- Save the agent.
Fields
| Field | Required | Accepted values | What it controls |
|---|---|---|---|
| Avatar | No | Preset icon or uploaded image | The icon shown for the agent in cards, sidebar entries, and chat surfaces. |
| Agent Name | Yes | Plain text | The display name of the agent. Editing this also updates the hidden profile slug. |
| Description | Yes | Plain text | A short explanation of what the agent does. This is shown in selection surfaces and used by AI generation helpers. |
| AI description button | No | Button action | Generates a description from the current agent name, current description, and instructions. |
Notes
The description generator requires an agent name. If the name is empty, the app shows an error asking you to enter a name first.