Your first agent
By the end of this tutorial you’ll have created and published a new AI agent in your workspace. It will have a name, a job description, an instructions document that shapes how it answers, and (optionally) a knowledge base it can search. Your team will be able to launch it from the Agents page and chat with it.
This is part of the Getting started series. It takes about 10 minutes.
Before you start
- You’ve completed Tutorial 1 — Create your account & workspace.
- You’re signed in at https://store.no-downtime.com .
- You have a clear idea of one job you want the agent to do. Something concrete — “Answer HR policy questions” or “Translate Arabic and English documents” — works better than something vague like “help with work”.
You don’t need any technical background. You write the instructions in plain English.
Step 1 — Open the Agents page
- In the left sidebar, click Agents.
- You land on the agents catalogue with a search box, status filter (All / Active / Draft), and either grid or list view.
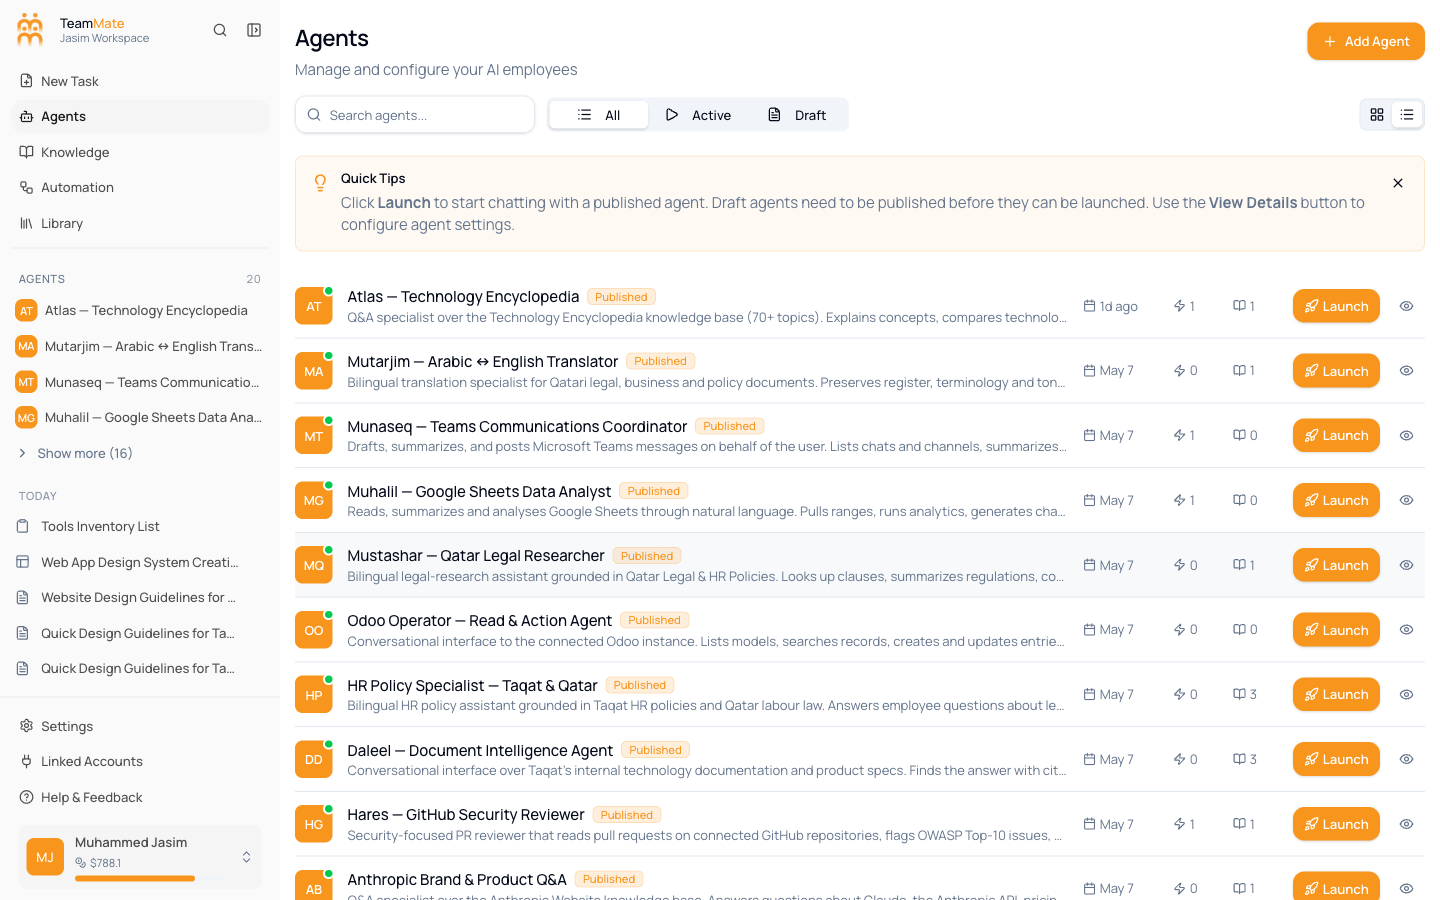
If your workspace already has agents (specialists that ship with the product), they’re listed here. You’re about to add your own.
Step 2 — Start a new agent
-
At the top-right of the Agents page, click Add Agent.
-
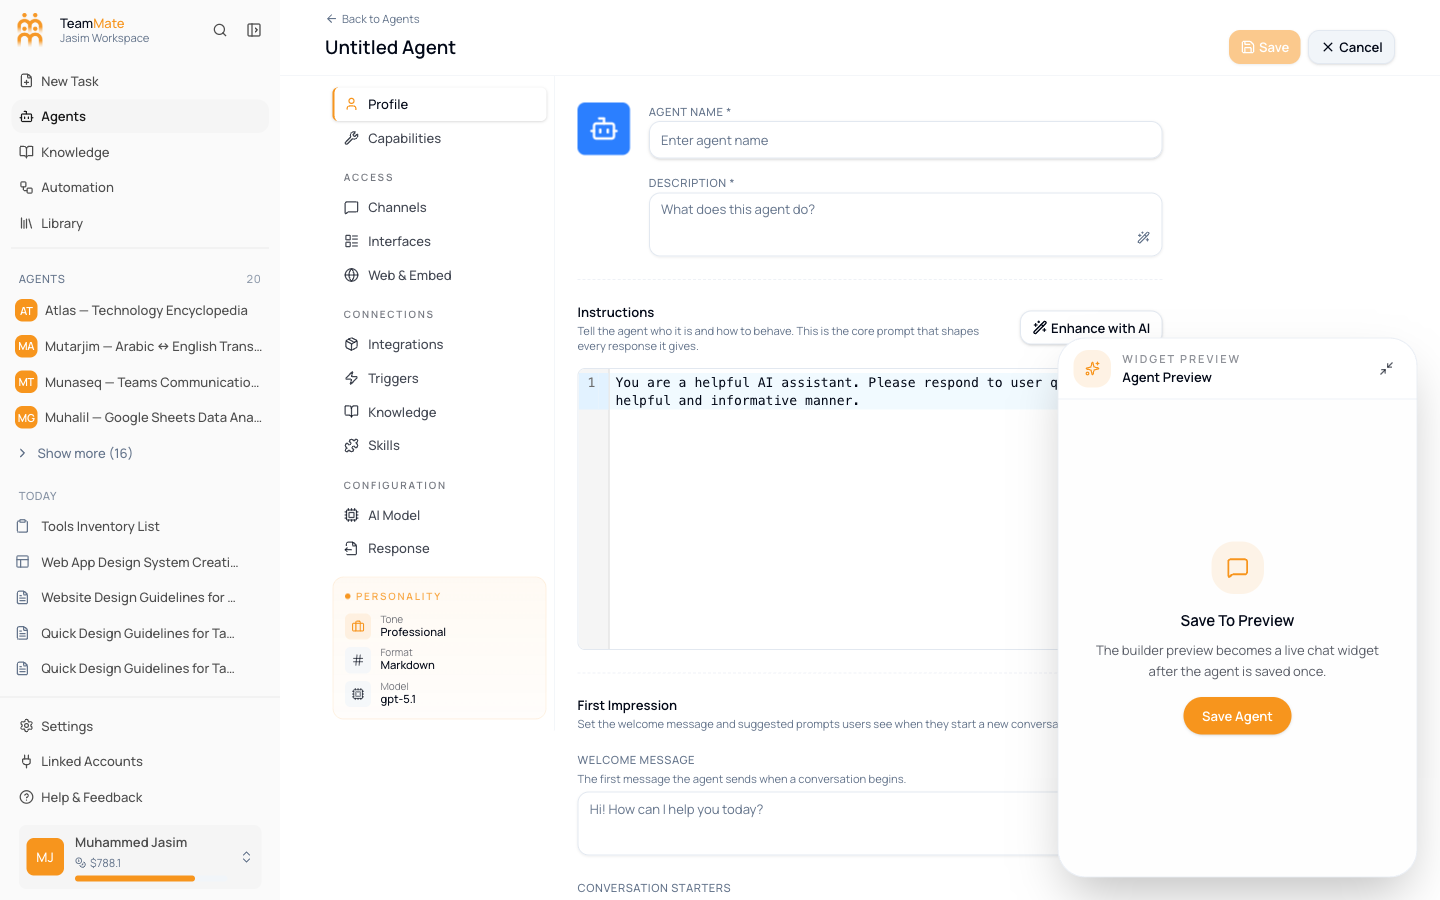
The agent builder opens. The header says “Untitled Agent” until you give it a name.
-
On the left side of the builder you’ll see a column of tabs: Profile, Capabilities, Channels, Interfaces, Web & Embed, Integrations, Triggers, Knowledge, Skills, AI Model, Response.
You’ll only touch three of them in this tutorial — Profile, Knowledge (optional), and AI Model (also optional). Everything else has sensible defaults.
Step 3 — Fill in the Profile tab
The Profile tab is where you tell the agent what it is.
-
In the Agent Name field, type a short, memorable name. Two-word names work well, e.g. “HR Assistant” or “Sales Coach”. Real example:
Hashim — Sales Coordinator. -
In the Description field, write one sentence about what this agent does. This text shows up everywhere the agent is listed (the chat picker, the catalogue, etc.), so the reader is usually deciding whether to use it. Example:
Helps the sales team draft follow-up emails after meetings, with the right tone for B2B prospects.
If you’d rather have an AI rewrite a rough draft, click the Generate with AI button to the right of the field.
-
In the Instructions field (the larger textarea further down), write what the agent should do, step by step. This is the most important field. Aim for:
- Who the agent is and who it’s serving (“You are the sales coordinator for…”).
- The rules it must follow (“Always respond in English. Keep replies to 4 paragraphs or fewer.”).
- The format the user wants (“Sign off with the user’s name.”).
- Examples of common requests and how to handle them.
Don’t worry about getting this perfect — you can edit it later and your changes apply on the very next message.
-
Optional: under First Impression, set a Welcome Message (what the agent says when a new chat opens) and add a few Conversation Starters (suggested prompts shown as buttons in a new chat).
Step 4 — Decide who can see it
Below the Profile fields you’ll see Workspace visibility with two options:
- Private — only you and people you explicitly add can see the agent. Use this while you’re still iterating.
- Public to workspace — every member of your workspace can launch and chat with the agent. Pick this once the agent is ready to share.
For your first agent, leave it on Private. You can switch later.
Step 5 — Attach knowledge (optional but recommended)
If the agent should answer from your own documents — policies, runbooks, FAQs, product specs — point it at a knowledge base now.
-
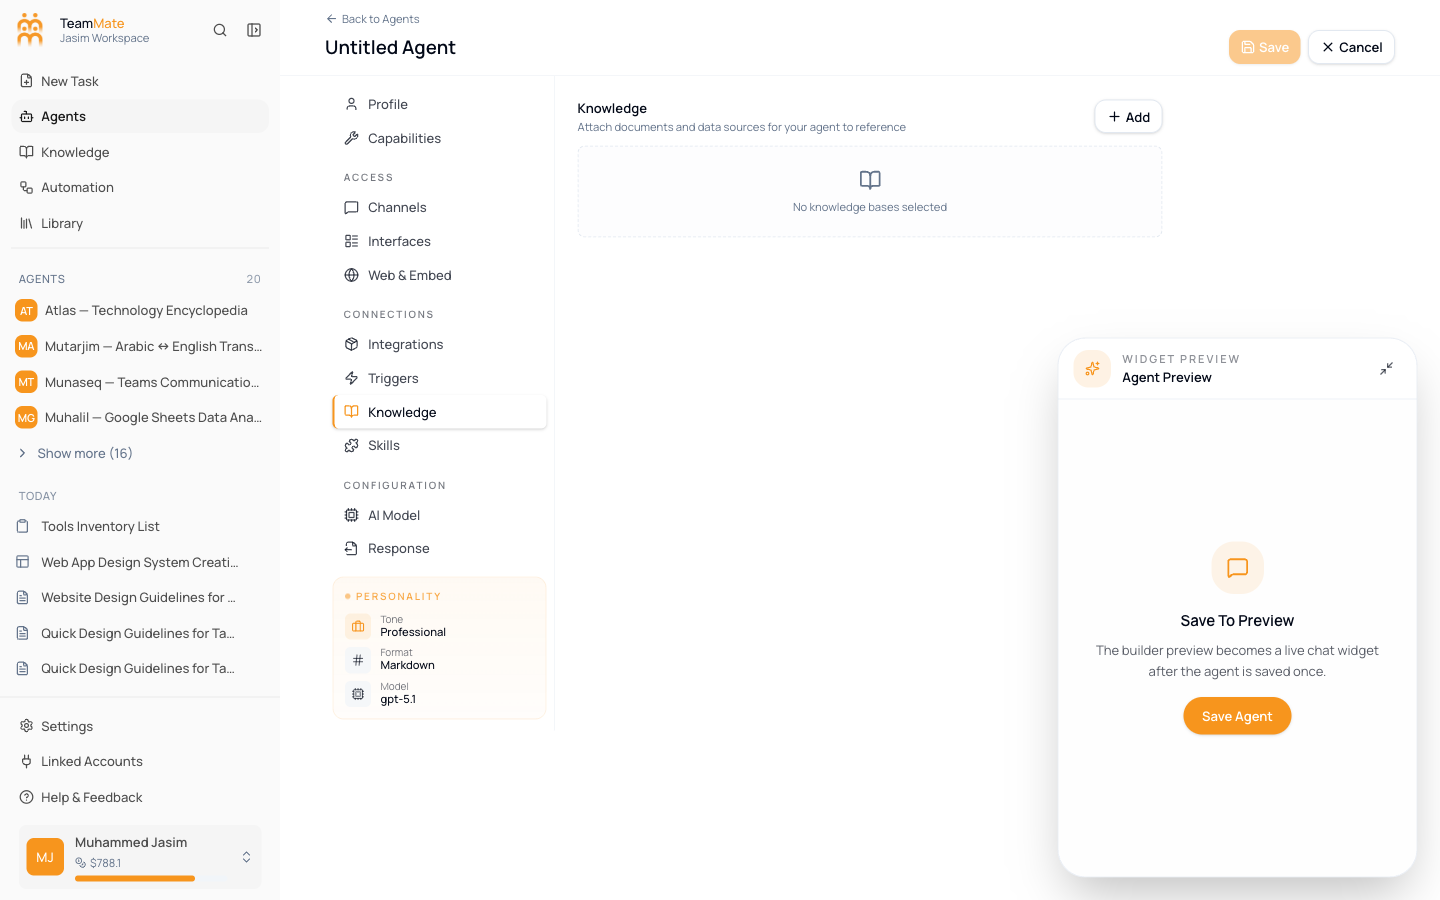
In the left tab list, click Knowledge.
-
If you already have a knowledge base in Sidebar → Knowledge, click Attach next to it.
-
If you don’t have one yet, follow Create a knowledge base and come back. You can also skip this step entirely; the agent will answer from its general knowledge.
Multiple knowledge bases can be attached. The agent searches all of them on every question and cites the source it used.
Step 6 — (Optional) Adjust capabilities
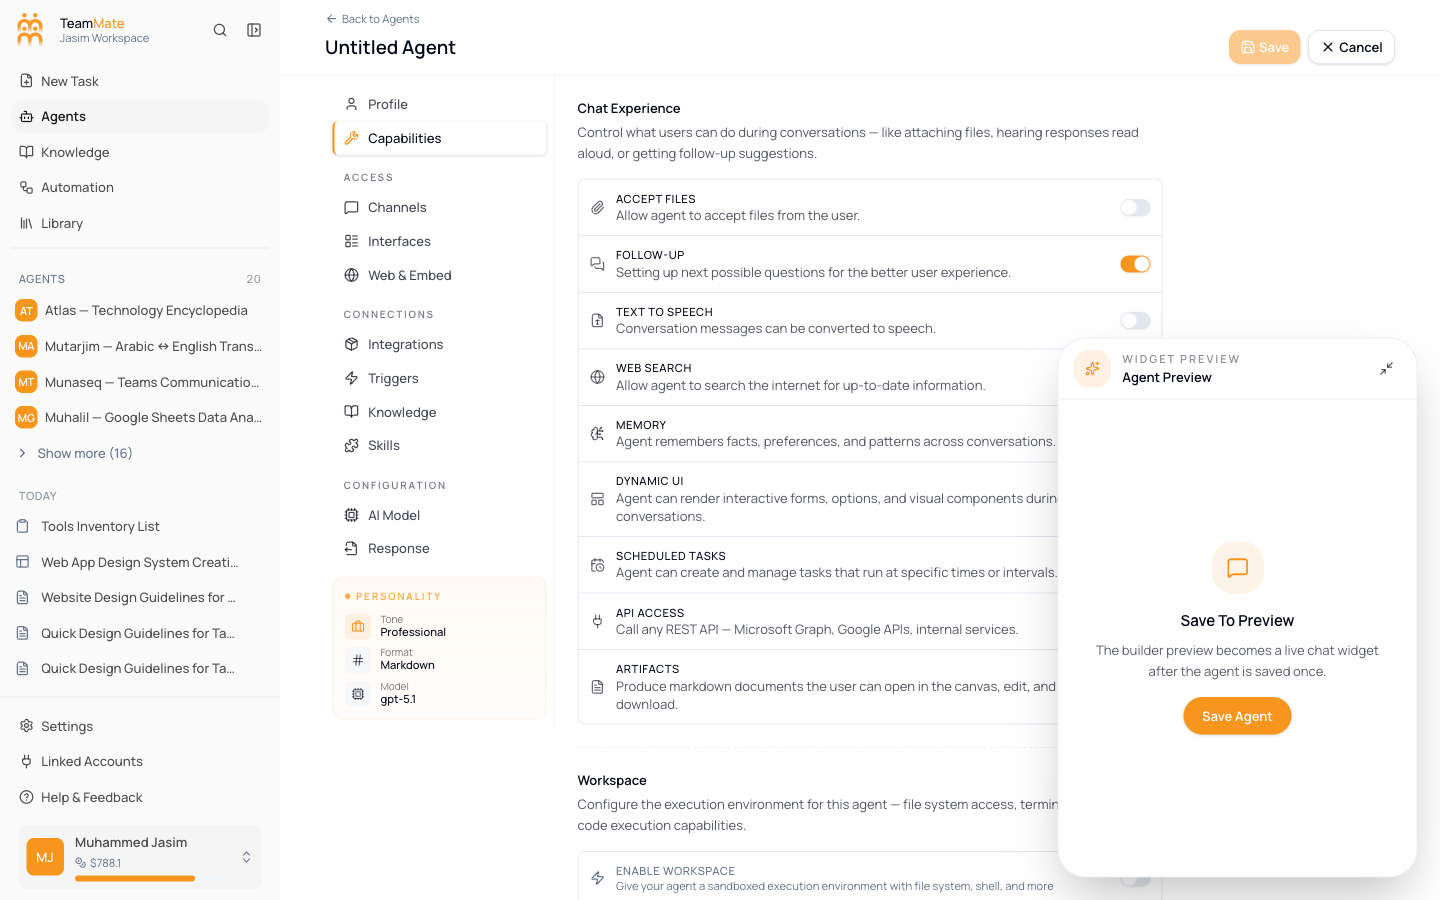
Capabilities are the high-level powers your agent can use — things like web search, code execution, file management, browser, or specific connected apps.
-
Click the Capabilities tab.
-
Toggle on what the agent needs. Less is more — only turn on capabilities the agent genuinely needs. Unused capabilities make the agent slower and cost more.
For a Q&A agent answering from a knowledge base, you usually don’t need any capabilities — the knowledge search itself is enough.
Step 7 — Save the agent
- In the top-right of the builder, click Save.
- The button stays disabled until you’ve filled in the required fields (name and description). If it’s still disabled, scroll up — the field with an error has a red outline.
- Once saved, the “Untitled Agent” title at the top changes to the agent’s name, and the right side of the screen now shows a live chat widget where you can test the agent immediately.
Step 8 — Test the agent
- In the live chat widget on the right, type a sample question the agent should be able to answer.
- Send the message.
- Read the reply.
If something’s off — wrong tone, missed a constraint, didn’t use the knowledge — go back to the Profile tab, tweak the instructions, click Save, and try the same question again. Edits apply on the next message; you don’t need to wait or republish.
Step 9 — Publish
While the agent is in Draft state it’s only available to you in the builder. Once you’re happy with it:
- Switch Workspace visibility to Public to workspace (if you want the whole team to use it).
- Click Save.
- Back on the Agents page, the agent now shows the Published badge. Your teammates can launch it from there or chat with it from the sidebar.
What you built
- A new agent in your workspace, listed under Agents with its own profile, instructions, and (optionally) knowledge base.
- The skills your team needs to keep building: edit the instructions, attach more knowledge, change visibility.
A few rules that will save you time
- Instructions matter more than the model. A clear, specific instructions document beats a fancy model every time. Spend time on the wording.
- Use the agent yourself for a week before publishing widely. Most rough edges only show up after 20 real conversations.
- One agent, one job. When you find yourself adding contradicting instructions (“act like a translator… also like a code reviewer…”), split into two agents.
What if the agent isn’t behaving?
- It ignores the instructions — your instructions might be too long or contradictory. Cut them in half and try again.
- It can’t find an answer that’s in the knowledge base — open Knowledge → <your KB> and make sure the documents are indexed (each should have a green check). If a document was just uploaded, indexing takes a minute.
- It’s slow — turn off any capabilities you’re not using under the Capabilities tab. They’re loaded per turn.
- Changes don’t show up — make sure you clicked Save. The button has to leave the “Saved” state and come back, which means a real edit landed.
Next
You have an agent. Now wire it into a flow.