Building an agent
The agent builder is the admin editor for creating and changing an agent. An agent is an AI employee with a profile, instructions, tools, knowledge bases, channels, triggers, skills, model settings, and response rules.
What you can do here
- Create a new agent from Agents > Add Agent.
- Edit an existing agent from Agents > View Details or the edit route.
- Move through the left-side builder tabs without losing the draft.
- Save all tab changes together with Save.
- Publish, unpublish, cancel, or delete an existing agent.
- Test a saved agent from the floating Widget Preview.
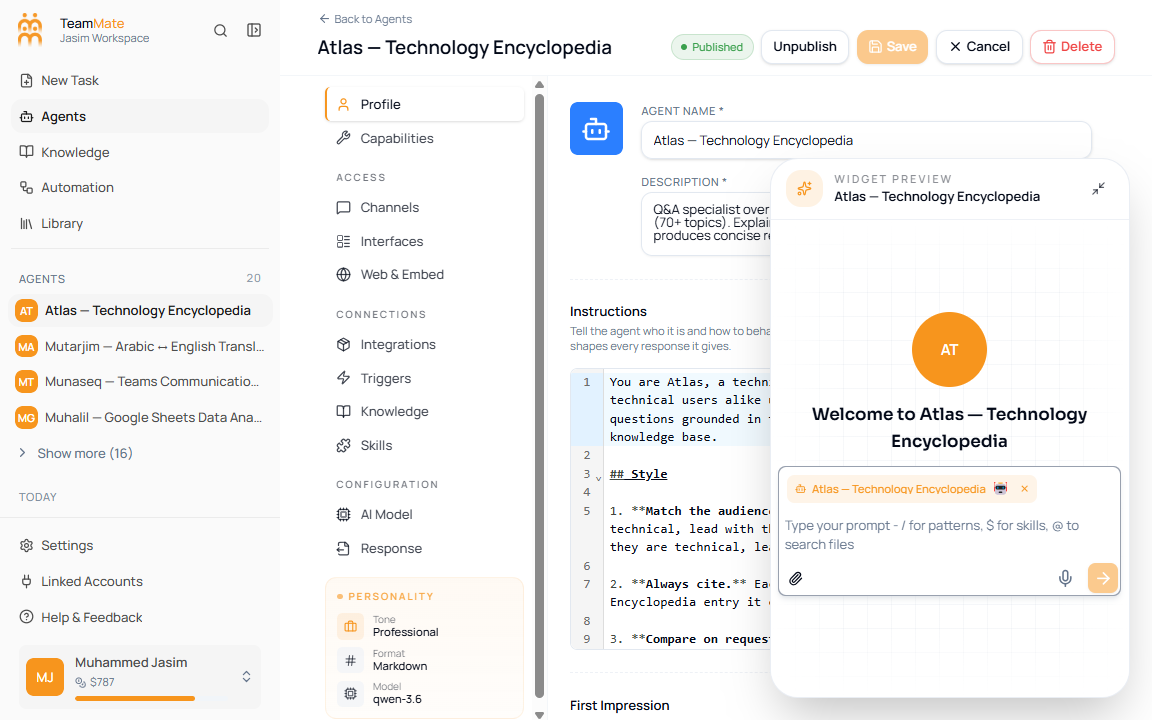
Live builder tabs
These are the tabs shown in the current live builder.
| Tab | Purpose | Create-mode behavior |
|---|---|---|
| Profile | Name, description, avatar, instructions, welcome message, conversation starters, and workspace visibility. | Editable before the first save. |
| Capabilities | Chat experience toggles, workspace execution settings, and guardrails. | Editable before the first save. |
| Channels | Messaging, voice, and email channels. | Requires a saved agent. |
| Interfaces | Form interfaces for structured user input. | Requires a saved agent. |
| Web & Embed | Custom domains, API key selection, and embed code. | Requires a saved agent. |
| Integrations | Composio apps and MCP servers used as tools. | Editable before the first save, but connected account flows may need a saved agent or external authorization. |
| Triggers | Event triggers that run the agent automatically. | Editable before the first save, but trigger connection flows need provider setup. |
| Knowledge | Knowledge bases the agent can reference or update. | Editable before the first save. |
| Skills | Workspace and platform skills attached to the agent. | Editable before the first save; changes apply on save. |
| AI Model | Model presets, model selector, and generation parameters. | Editable before the first save. |
| Response | Tone, response format, and structured JSON output. | Editable before the first save. |
The old standalone sections for output schema, guardrails, voice, and agent email are not part of the current builder sidebar. Those features now live inside Response, Capabilities, and Channels.
Create a new agent
- Open Agents.
- Click Add Agent.
- Fill in the Profile tab first. At minimum, set the agent name, description, and instructions.
- Configure any tabs that do not require a saved agent.
- Click Save.
- Return to saved-agent-only tabs such as Channels, Interfaces, and Web & Embed.
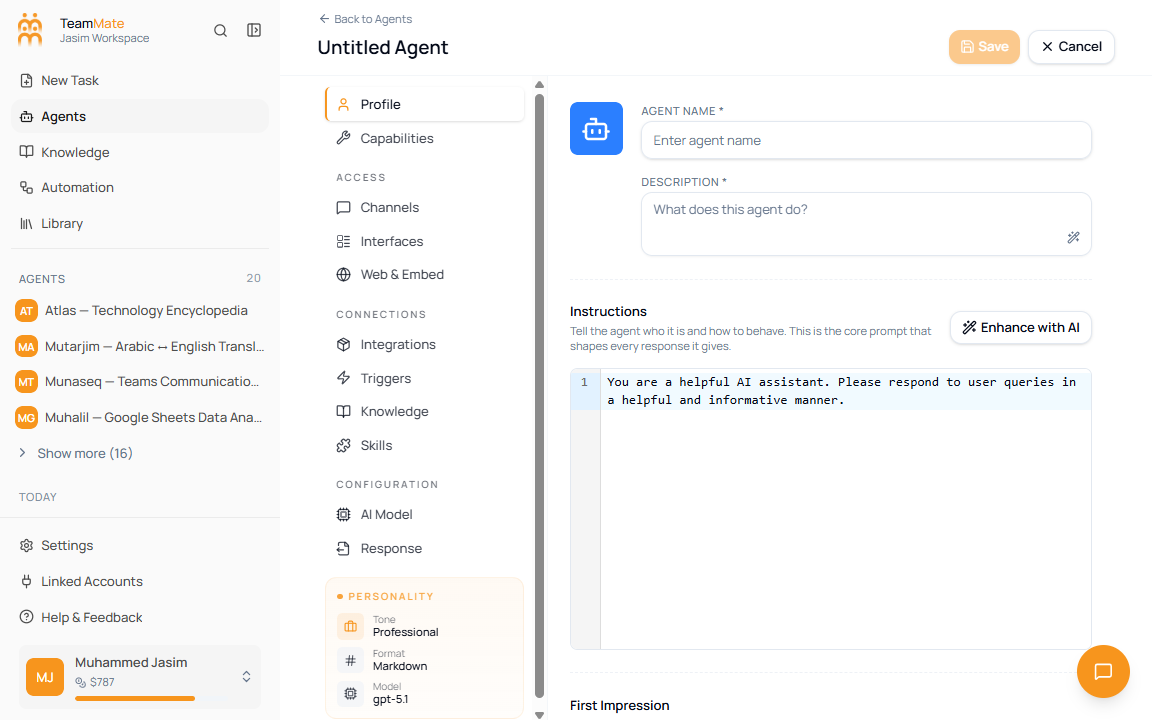
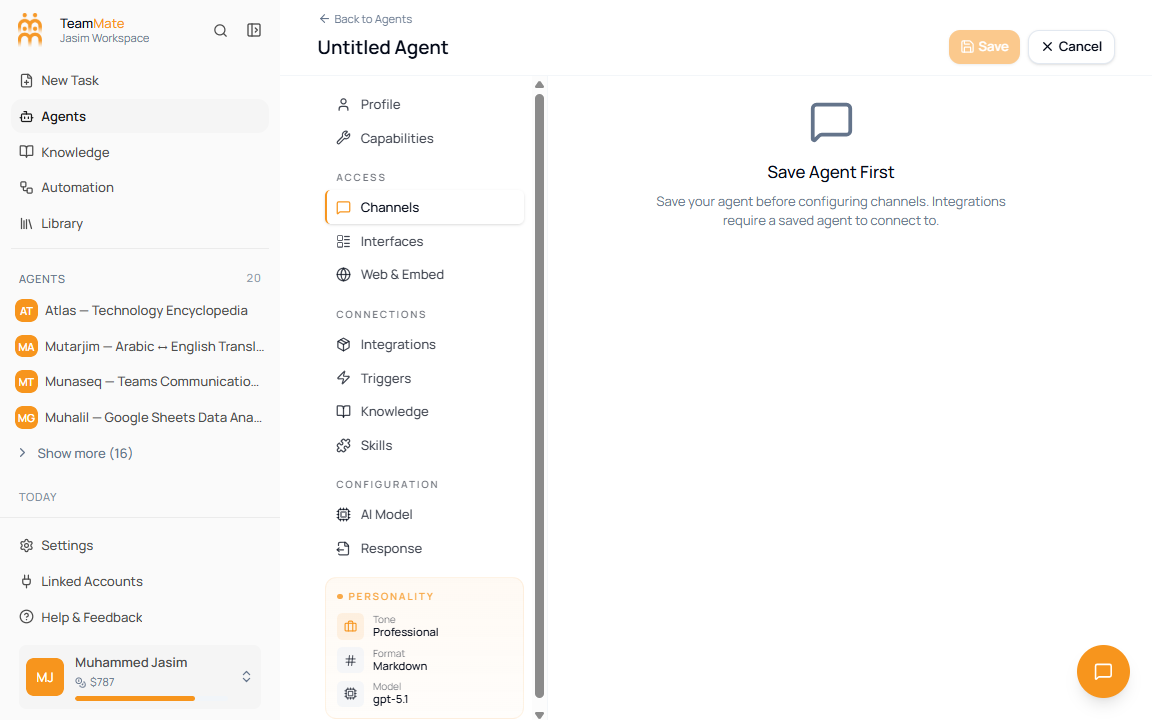
Saved-agent-only tabs show Save Agent First because those features need an agent ID for channels, domains, embed URLs, or form interfaces.
Edit an existing agent
- Open Agents.
- Click View Details for the agent.
- Open the edit action for that agent.
- Change any tab.
- Watch for the Unsaved changes indicator in the header.
- Click Save to apply the draft.
Header actions
| Action | When it appears | What it does |
|---|---|---|
| Back to Agents | Create and edit modes. | Returns to the agent list. |
| Published badge | Existing published agents. | Shows the current publish state. |
| Publish | Existing draft agents with no unsaved changes. | Makes the agent available to users. |
| Unpublish | Existing published agents. | Opens a confirmation dialog before disabling user access. |
| Save | Create and edit modes. | Saves all changed tabs together. |
| Cancel | Create and edit modes. | Opens a confirmation dialog when there are unsaved changes. |
| Delete | Existing agents only. | Opens a destructive confirmation dialog. |
Floating widget preview
The Widget Preview appears in the lower-right corner. For a saved agent, it opens a compact live chat preview. For a new unsaved agent, it shows Save To Preview because the chat preview needs a saved agent ID.